Chocolate Peanut Butter Bars are the ultimate crowd-pleaser—easy to make, rich in flavor, and perfectly indulgent without the need for an oven. Whether you’re craving a nostalgic old-school dessert or looking to try a healthier spin, these bars have something for everyone. In this guide, you’ll discover how to make them step-by-step, explore healthier options, find no-graham alternatives, and master the tricks to getting perfect bars every time.
Don’t miss our No-Bake Chocolate Peanut Butter Bars – The Ultimate Sweet Treat for another variation you’ll love.
Print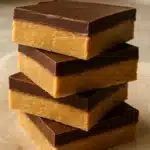
Chocolate Peanut Butter Bars – The Best 5-Ingredient No-Bake Recipe
- Prep Time: 10 minutes
- Cook Time: 2 hours
- Total Time: 2 hours 10 minutes
- Yield: 16 bars 1x
- Category: Dessert
- Method: No-Bake
- Cuisine: American
Description
These no-bake Chocolate Peanut Butter Bars are a rich, creamy, and irresistible dessert made with just five simple ingredients. With a soft peanut butter base and a smooth chocolate topping, they’re the perfect quick treat for any occasion. Whether you’re hosting a party, packing lunches, or simply satisfying a sweet tooth, these bars come together in minutes—no oven required. Keep them chilled and enjoy a bite of chocolate-peanut butter bliss anytime you need a pick-me-up.
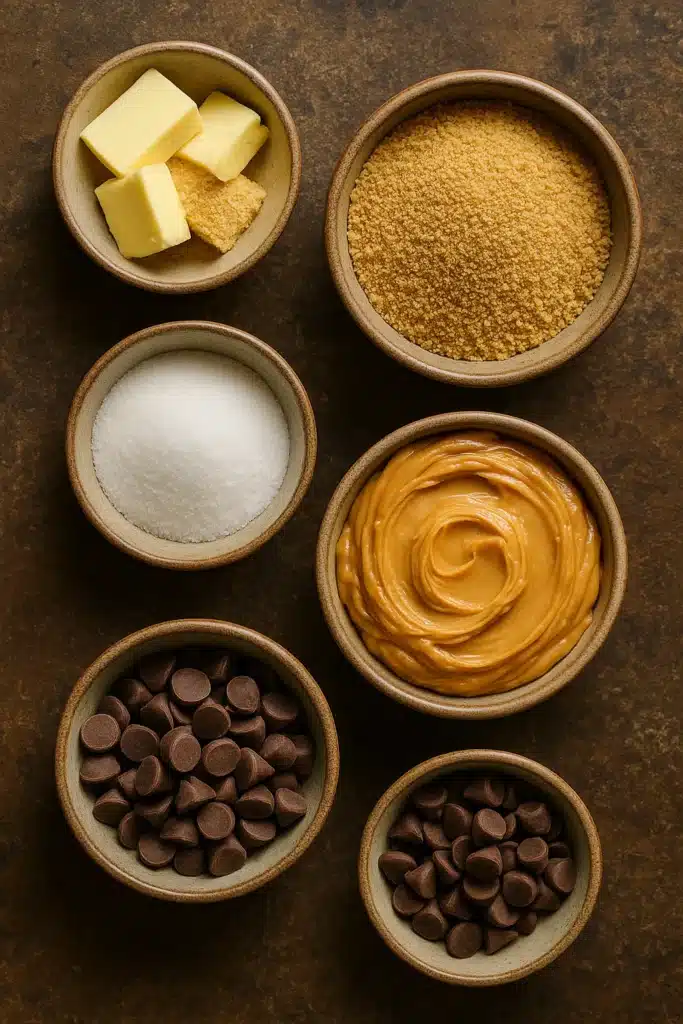
Ingredients
1/2 cup (113g) salted butter, melted
1 cup (120g) graham cracker crumbs (about 8 full sheets)
2 cups (240g) confectioners’ sugar
1 cup + 2 tablespoons (280g) creamy peanut butter, divided
1 cup (180g) semi-sweet chocolate chips
Instructions
-
Line a Pan
Line an 8×8 or 9×9-inch square pan with parchment paper or foil. -
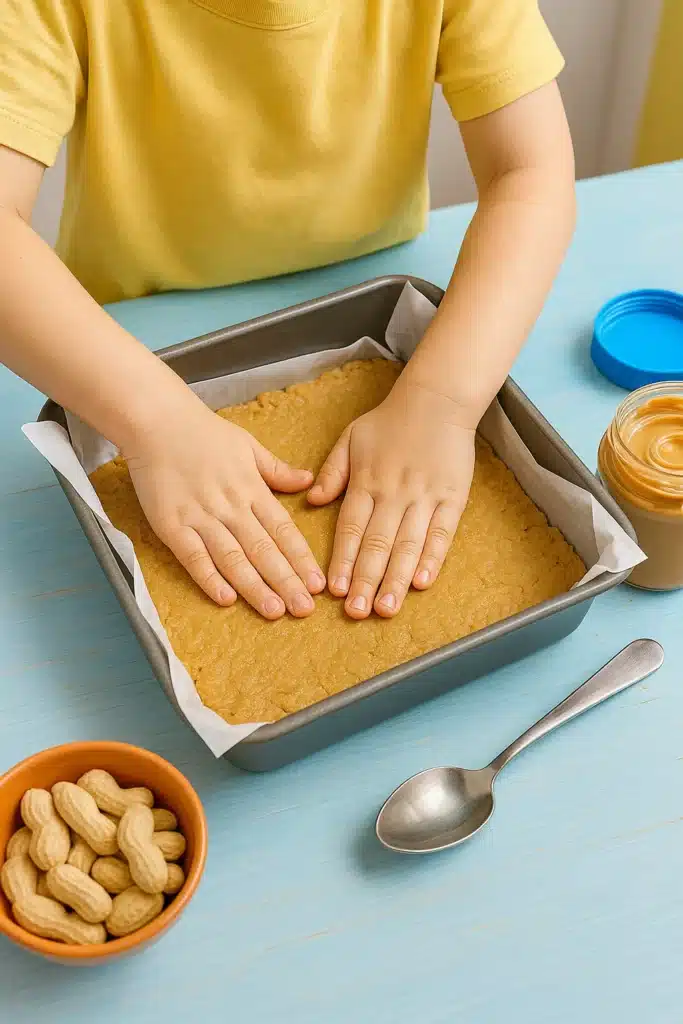
Make the Base
In a bowl, mix the melted butter, graham cracker crumbs, and confectioners’ sugar. Stir in 1 cup of peanut butter until well combined. Press mixture evenly into the prepared pan. -
Prepare the Topping
Melt chocolate chips and the remaining 2 tablespoons of peanut butter together (microwave or stovetop). Stir until smooth and pour over the peanut butter layer. -
Chill
Refrigerate for at least 2 hours or until firm. Let sit at room temperature for 10 minutes before slicing. -
Serve & Store
Cut into squares and enjoy. Store in the fridge for up to 1 week or freeze for up to 3 months.
Notes
Use a hot knife to slice cleanly.
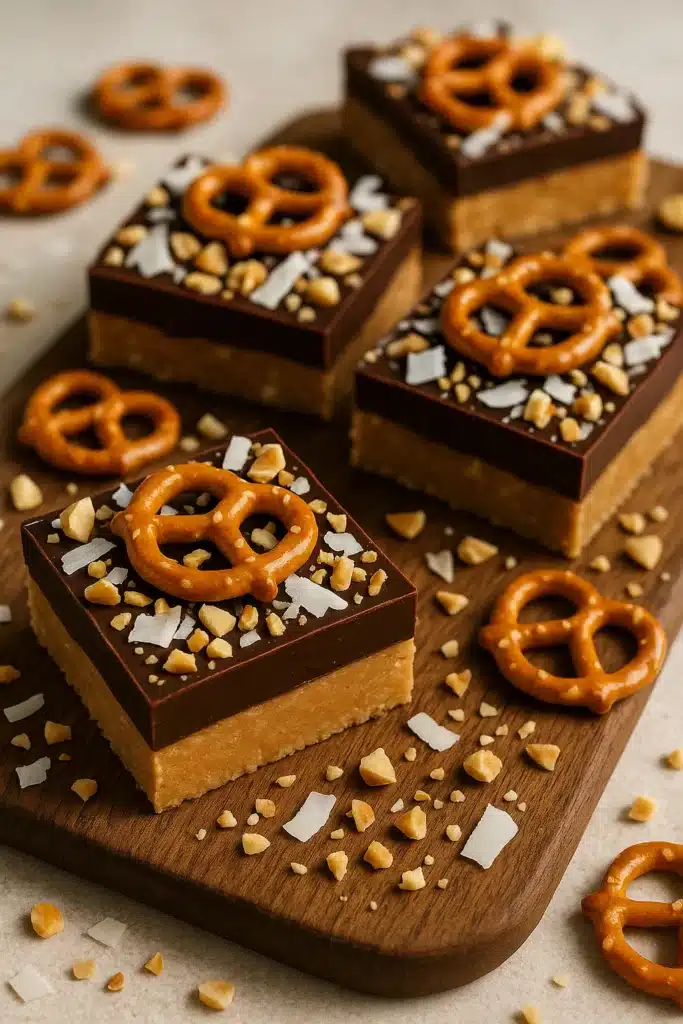
Sprinkle sea salt or chopped nuts on top for added flair.
For a healthier version, use almond flour and natural peanut butter.
Nutrition
- Calories: 270 kcal
- Sugar: 21g
- Sodium: 95mg
- Fat: 17g
- Saturated Fat: 6g
- Carbohydrates: 28g
- Fiber: 2g
- Protein: 4g
- Cholesterol: 10mg
Table of Contents
Table of Contents
Why Chocolate Peanut Butter Bars Are So Popular
The timeless chocolate and peanut butter combo
Few flavor pairings are as beloved as chocolate and peanut butter. The smooth richness of peanut butter paired with the sweet snap of chocolate creates an unforgettable bite. It satisfies both sweet and salty cravings, making it a go-to for kids, adults, and every dessert lover in between.
No-bake convenience: Fast, simple, satisfying
In a world where time is short and cravings are real, no-bake desserts win the day. Chocolate Peanut Butter Bars can be whipped up in 10 minutes, chilled, and ready to go with no oven, mixer, or fancy tools. That simplicity is part of why these bars are a hit for potlucks, school snacks, and lazy weekend cravings.
These bars are also incredibly versatile—just like our Chocolate Chia Pudding Recipe – Healthy Dessert, you can adjust them to suit your taste or dietary needs with ease.
Classic Chocolate Peanut Butter Bar Recipe
5 simple ingredients you already have
The beauty of this chocolate peanut butter bar recipe lies in its simplicity. With just five pantry staples, you can create a rich, layered dessert that tastes like it took hours—but really only takes minutes.
Here’s what you’ll need:
| Ingredient | Amount | Notes |
|---|---|---|
| Salted butter (melted) | 1/2 cup (113g) | Adds richness and binding power |
| Graham cracker crumbs | 1 cup (120g) | Crushed fine for smooth base |
| Confectioners’ sugar | 2 cups (240g) | Sweetens and firms up the texture |
| Creamy peanut butter | 1 cup + 2 Tbsp (280g) | Divided for base and topping |
| Semi-sweet chocolate chips | 1 cup (180g) | Melted into a glossy top layer |
This is a no-bake dessert, so the texture depends on how you mix and chill your layers. Don’t overcomplicate it—these basic ingredients come together for magic.
Looking for inspiration? Try our Almond Butter Chocolate Bites as a twist on this base.
Step-by-step guide to perfect bars
Follow these steps to create decadent, perfectly layered chocolate peanut butter bars:
- Line your pan
Use an 8-inch or 9-inch square pan lined with parchment paper or foil. This makes removal and cleanup super easy. - Make the peanut butter base
In a medium bowl, combine the melted butter, graham cracker crumbs, and confectioners’ sugar. Stir in 1 cup of creamy peanut butter until smooth and thick. Press this mixture evenly into the bottom of your pan. Use a spatula or the bottom of a glass to smooth it out. - Prepare the chocolate topping
In a microwave-safe bowl or using a double boiler, melt 1 cup of chocolate chips with 2 tablespoons of peanut butter. Stir until smooth and glossy. The added peanut butter softens the chocolate layer for a perfect bite. - Spread and chill
Pour the chocolate mixture over your peanut butter layer and spread evenly. Refrigerate for at least 2 hours until completely firm. For best results, let them sit at room temperature for about 10 minutes before slicing. - Cut and serve
Lift the bars out using the parchment. Cut into squares using a sharp knife. Serve chilled or at room temp.
These bars store well in the fridge for up to 1 week, but we doubt they’ll last that long.
For a no-oven spin on other treats, don’t miss our No-Bake Bliss – Easy Dessert Recipes.
Healthier Chocolate Peanut Butter Bars
Ingredient swaps for a cleaner treat
You don’t have to ditch indulgence to eat cleaner. Chocolate Peanut Butter Bars can be made healthier with just a few smart swaps—while still tasting amazing.
Here are some easy substitutions to lighten up your bars without sacrificing flavor:
| Original Ingredient | Healthier Substitute | Why It Works |
|---|---|---|
| Salted butter | Coconut oil or grass-fed ghee | Healthier fats with a mild flavor |
| Graham cracker crumbs | Almond flour or oat flour | Gluten-free and lower carb |
| Confectioners’ sugar | Coconut sugar (blended into powder) | Unrefined, lower glycemic index |
| Creamy peanut butter | Natural unsweetened peanut butter | No added sugars or hydrogenated oils |
| Semi-sweet chocolate chips | Dark chocolate (70%+ cacao) or stevia-sweetened chocolate | Less sugar, more antioxidants |
These swaps not only reduce sugar and processed ingredients but also increase healthy fats and fiber. They’re perfect for those looking to enjoy sweets while staying on track with wellness goals.
Check out Chocolate Avocado Mousse for another indulgent treat made healthier.
How to reduce sugar and calories naturally
Here are a few more simple ways to make your bars leaner:
- Use powdered monk fruit sweetener instead of confectioners’ sugar. It blends the same but contains zero calories.
- Cut smaller squares: These bars are rich, so bite-sized portions still satisfy.
- Go crustless: For a low-carb version, skip the graham cracker layer and just use a peanut butter-chocolate blend.
Want to experiment? Many readers have success with adding chia seeds, ground flax, or collagen powder to boost nutrition. These add-ins help make your snack not just delicious, but functional.
Don’t miss our related article on Silky Smooth Avocado Mousse – No-Bake for more healthy dessert inspiration.
Old-Fashioned Chocolate Peanut Butter Bars
What makes them “old-fashioned”?
The term old-fashioned in desserts often refers to recipes that use classic, pantry-safe ingredients and nostalgic textures that remind people of their childhood. Old-fashioned chocolate peanut butter bars are no different—they’re dense, rich, and taste just like the ones you’d find at a church bake sale or packed in a school lunchbox.
What sets these apart from the modern or healthy versions?
- More sugar and richness: Often made with extra powdered sugar and full-fat peanut butter for a sweeter, more indulgent base.
- Smooth chocolate topping: Using milk chocolate instead of dark adds a creamier finish.
- Traditional ingredients: Think good old graham crackers, creamy Jif or Skippy, and real butter, not coconut oil or almond flour.
They’re made to be sweet, sturdy, and familiar—no substitutions or tweaks required. It’s dessert the way grandma made it.
Traditional textures and flavors that feel nostalgic
If you’ve ever bitten into an old-fashioned peanut butter bar, you know it’s not just about flavor—it’s about texture.
- The base is slightly gritty from graham crumbs and sugar, yet firm from the peanut butter and butter combo.
- The top layer is a smooth, shiny sheet of chocolate that cracks just slightly when you bite in.
- When chilled, they hold their shape beautifully; at room temperature, they melt in your mouth.
These classic bars are perfect for holidays, potlucks, and parties. They’re easy to cut, easy to carry, and impossible to resist.
For another traditional recipe that brings back sweet memories, don’t miss our Strawberry Shortcake Cups.
Chocolate Peanut Butter Bars Without Graham Crackers
Best substitutions for graham crackers
Whether you’re out of graham crackers or want a gluten-free or healthier option, skipping them doesn’t mean you have to skip the bars. There are several tasty, texture-friendly alternatives that work beautifully in chocolate peanut butter bars.
Here are some top-rated graham cracker substitutes:
| Substitute | Flavor Profile | Texture |
|---|---|---|
| Almond flour | Mild, nutty | Soft, slightly crumbly |
| Oat flour | Earthy, wholesome | Dense and chewy |
| Crushed digestive biscuits | Slightly sweet, wheaty | Crumbly, classic bar texture |
| Gluten-free cookies (plain) | Neutral or vanilla-based | Crunchy if coarsely crushed |
| Shredded coconut + almond meal | Sweet and tropical | Chewy and dense |
To replace 1 cup of graham cracker crumbs, use the same volume of any of the above, though you may need to slightly adjust the butter to maintain the correct consistency.
Pro Tip: Toast your oat flour or almond flour for 5–7 minutes before mixing—it adds warmth and depth, mimicking that roasted graham cracker note.
How it changes taste and texture
When you remove graham crackers, the texture of the base will likely be:
- Softer or moister, depending on what you replace them with (especially almond or oat flour)
- Less crumbly but more chewy
- Lighter in taste if you use neutral substitutes like coconut flour (note: coconut flour needs more moisture)
Flavor-wise, you may lose the familiar honey-like note of graham crackers—but that opens the door to creative pairings.
Try mixing in:
- Crushed pretzels for a salty crunch
- Chopped dates for natural sweetness
- Ground flaxseed for added fiber and structure
Once you get the base right, the rest of the recipe stays the same: smooth peanut butter, sweet chocolate, and a little chill time.
For more unique base combinations, check out our Quick Grab-and-Go Breakfast Muffins—many of the textures work perfectly here too.
Kid-Friendly Peanut Butter Bars
Easy prep with kids involved
Chocolate peanut butter bars are one of the easiest desserts to make with kids, not just for them. Since there’s no baking, no knives, and minimal stovetop work, these bars are practically made for little hands and short attention spans.
Here are ways to get kids involved:
- Mixing the base: Let them stir the melted butter, sugar, and peanut butter mixture. They’ll love watching it come together.
- Pressing the crust: Show them how to pat the base into the pan evenly—use a spatula or clean hands.
- Spreading the chocolate layer: Once it’s melted (by an adult), kids can pour and spread it out smoothly over the base.
- Decorating: While not traditional, let them sprinkle mini chocolate chips, rainbow sprinkles, or crushed cereal on top before chilling.
Letting kids help makes them more excited to try the finished product—and builds kitchen confidence.
If you’re looking for another easy recipe to make together, don’t miss our Banana Pancakes Recipe—another family-favorite.
Lunchbox-safe and allergy-friendly options
Peanut butter is a lunchtime favorite, but allergies can make it tricky in school environments. Here’s how to tweak these bars to make them more inclusive:
Peanut-Free Alternatives:
- Sunflower seed butter: Great for nut-free schools—similar texture and flavor.
- Soy nut butter: High in protein and very close to peanut butter in creaminess.
- WowButter: A favorite in allergy-aware households.
Chocolate Options:
- Use dairy-free chocolate chips if needed.
- Choose dark chocolate with low sugar for a more wholesome take.
Add-ins to Boost Nutrition:
- Ground flaxseed
- Chia seeds
- Crushed puffed rice for a fun texture
By making these small changes, you keep the bars safe, fun, and still incredibly delicious. And the best part? Kids won’t even notice the difference.
Serving and Storing Tips for Best Results for Chocolate Peanut Butter Bars
Cutting clean bars every time
One of the most satisfying parts of making chocolate peanut butter bars is slicing them into perfect, uniform squares. But if you’ve ever tried and ended up with cracked chocolate or uneven layers, don’t worry—these simple tricks will help you slice like a pro:
- Chill thoroughly: Bars must be fully firm before slicing—at least 2 hours in the refrigerator is key.
- Use a hot knife: Run a sharp knife under hot water, dry it, and then slice. This allows the blade to cut cleanly through the Chocolate Peanut Butter Bars without cracking.
- Score the top lightly first: Before cutting all the way through, make gentle marks with your knife to guide your cuts.
- Wipe between cuts: Clean the blade after each slice for neat edges and a polished finish.
These techniques ensure professional-looking bars every time, perfect for entertaining or gifting.
How long they last in the fridge or freezer
One reason these bars are a favorite in busy households is that they store beautifully—no need to eat them all at once (though you might want to).
| Storage Method | Shelf Life | Tips |
|---|---|---|
| Refrigerator | Up to 7 days | Store in airtight container |
| Freezer | Up to 3 months | Layer with parchment between bars |
| Room Temperature | Up to 4 hours (max) | Only for short serving periods |
Want to stock up? Make a double batch and freeze half. When ready to eat, let the bars thaw in the fridge overnight or sit at room temp for 30 minutes.
They’re a great addition to any meal prep rotation—right along with our 5-Minute Healthy Breakfast Ideas.
Pro tip: Wrap individual bars in parchment and pop them into lunchboxes or snack packs for quick grab-and-go energy boosts.
Creative Variations on Chocolate Peanut Butter Bars
Add-ins: Nuts, pretzels, sea salt, and more
Once you’ve mastered the classic recipe, it’s time to have a little fun. These chocolate peanut butter bars are a perfect blank canvas for adding textures, flavors, and even a little surprise crunch. Whether you want something sweet, salty, or a mix of both, these add-ins will take your bars to the next level:
| Add-In | How to Use |
|---|---|
| Chopped nuts (almonds, walnuts, peanuts) | Mix into the peanut butter base for crunch |
| Crushed pretzels | Sprinkle over the chocolate layer or mix into base |
| Sea salt flakes | Sprinkle lightly over melted chocolate for contrast |
| Shredded coconut | Add to the base or top for a tropical twist |
| Mini chocolate chips or M&Ms | Stir into the base or press into the topping |
| Crushed cereal (Chex, Rice Krispies) | Mix into the base for extra crunch |
These variations not only enhance the flavor but also create visual appeal—perfect if you’re making a dessert platter or giving these bars as a homemade gift.
Turning bars into bites, cups, or layered desserts
The beauty of this recipe is its versatility. You’re not locked into just “bars”—you can mold and shape it into other fun dessert formats:
1. Mini Peanut Butter Cups
- Use a mini muffin tin with liners.
- Press a spoonful of the peanut butter base into each cup.
- Top with melted chocolate.
- Chill and serve like bite-sized Reese’s.
2. Peanut Butter Bites (No-bake balls)
- Roll the base mixture into balls.
- Dip or drizzle with chocolate.
- Chill on a tray until firm.
- Great for on-the-go snacking!
3. Layered Dessert Jars
- Alternate layers of crushed base, chocolate ganache, and whipped cream or Greek yogurt.
- Assemble in mini jars for elegant single-serve treats.
4. Peanut Butter Ice Cream Topping
- Crumble leftover bars over vanilla or chocolate ice cream.
- Add a drizzle of melted chocolate or caramel sauce.
For another no-fuss dessert twist that works in layers or jars, check out our Raspberry Cheesecake Recipe.
With endless combinations and shapes, this dessert adapts to your mood, your guests, or just whatever’s in the pantry.
Troubleshooting Common Mistakes
Why your bars might crumble or not set
Even with the simplest no-bake recipe, things can sometimes go wrong. If your chocolate peanut butter bars didn’t quite turn out how you hoped, don’t toss them just yet. Here’s how to fix the most common issues:
Issue 1: Bars are too soft or won’t hold their shape
- Cause: Too much butter or peanut butter, or not enough chilling time.
- Fix: Chill for an additional hour or place in the freezer for 15–30 minutes before cutting. Next time, try reducing butter slightly or adding a bit more confectioners’ sugar for firmness.
Issue 2: Crumbly base
- Cause: Not enough peanut butter or the wrong substitute for graham crackers.
- Fix: Add a tablespoon of melted butter or peanut butter and remix. Press firmly into the pan.
Issue 3: Chocolate layer cracks when slicing
- Cause: Cutting cold chocolate with a cold knife.
- Fix: Run your knife under hot water, dry it, then slice slowly. Or let bars sit at room temperature for 10 minutes before cutting.
Issue 4: Oily separation in the base
- Cause: Using natural peanut butter without stirring well.
- Fix: Always stir natural peanut butter thoroughly before using. If it’s too runny, add a touch more sugar or crumbs to absorb the oil.
Fixes for oily, dry, or too-soft bars
| Problem | Quick Fix |
|---|---|
| Base too oily | Mix in extra crumbs or powdered sugar to absorb excess oil |
| Bars fall apart when cut | Chill longer and use a sharp, hot knife for slicing |
| Topping too soft | Use a higher ratio of chocolate to peanut butter for a firmer set |
| Bars too dry | Add more peanut butter (1 Tbsp at a time) or a splash of milk if needed |
Troubleshooting may seem frustrating at first, but the good news? Even imperfect bars are delicious. And once you find your perfect balance, you’ll be making these with total confidence every time.
Still hungry for more troubleshooting-friendly desserts? Don’t miss our guide to Cheese Pancakes – Easy Fixes for Fluffy Results.
FAQs About Chocolate Peanut Butter Bars
What’s the easiest recipe for chocolate peanut butter bars?
Combine melted butter, graham cracker crumbs, powdered sugar, and peanut butter. Press into a pan, then top with melted chocolate and more peanut butter. Chill until firm. It’s a no-bake, 5-ingredient classic that takes just 10 minutes to prep.
How are old-fashioned chocolate peanut butter bars different from modern ones?
Old-fashioned bars use pantry staples like graham crackers, powdered sugar, and classic creamy peanut butter. They’re richer, sweeter, and a bit firmer than today’s health-conscious versions. They evoke the nostalgic taste of school lunches and bake sales.
Can chocolate peanut butter bars be made healthy?
Absolutely! Swap out graham crackers for almond or oat flour, use natural peanut butter, and replace confectioners’ sugar with powdered monk fruit or coconut sugar. You can also use dark chocolate or sugar-free chips for the topping.
What can I use instead of graham crackers in peanut butter bars?
Try almond flour, oat flour, crushed gluten-free cookies, or even shredded coconut. These substitutes keep the bars firm while adding interesting new textures and flavors.
Conclusion
Chocolate Peanut Butter Bars aren’t just another dessert—they’re the ultimate combo of comfort, ease, and indulgence. From old-fashioned bakes to modern, healthy spins, there’s a version for everyone. With just a few ingredients and a little chill time, you can whip up a sweet treat that delights both kids and adults.
Whether you’re using graham crackers or going flour-free, indulging in a nostalgic version or making a clean snack, this guide has you covered. And remember, even when things go a little off—too soft, too crumbly, too messy—they still taste amazing.
If you’re hungry for more decadent and no-fail desserts, check out our Chocolate Chia Pudding and No-Bake Bliss Collection.
Craving more easy, delicious recipes like these Chocolate Peanut Butter Bars? Follow us on Facebook and Pinterest for daily kitchen inspiration, no-bake treats, and fun foodie tips you’ll love to share and save!